
Customization Tips & Tricks
CROPPED
Want to crop it yourself? Here’s how:
Measure 7” down from the bottom of the armpit (S–XL) or 9” (2X–5X) and mark your line. Cut straight across. Once cut, gently tug the bottom edge to create that soft, rolled look.
If you’re working with a hoodie, be aware the front pouch pocket will be cut off completely.
Pro tip: If your graphic is on the front or back, always cut below the print so you don’t damage it. Longer graphics = a longer crop. Every piece will turn out a little different—and that’s the point.

ASYMMETRICAL CROPPED
Measure 7” down (S–XL) or 9” (2X–5X) on the left side, then cut across at an angle up toward the opposite side seam to create that asymmetrical look.
Tug the edge to roll it.
If your graphic is on the left side, switch and cut from the right to keep the design intact.

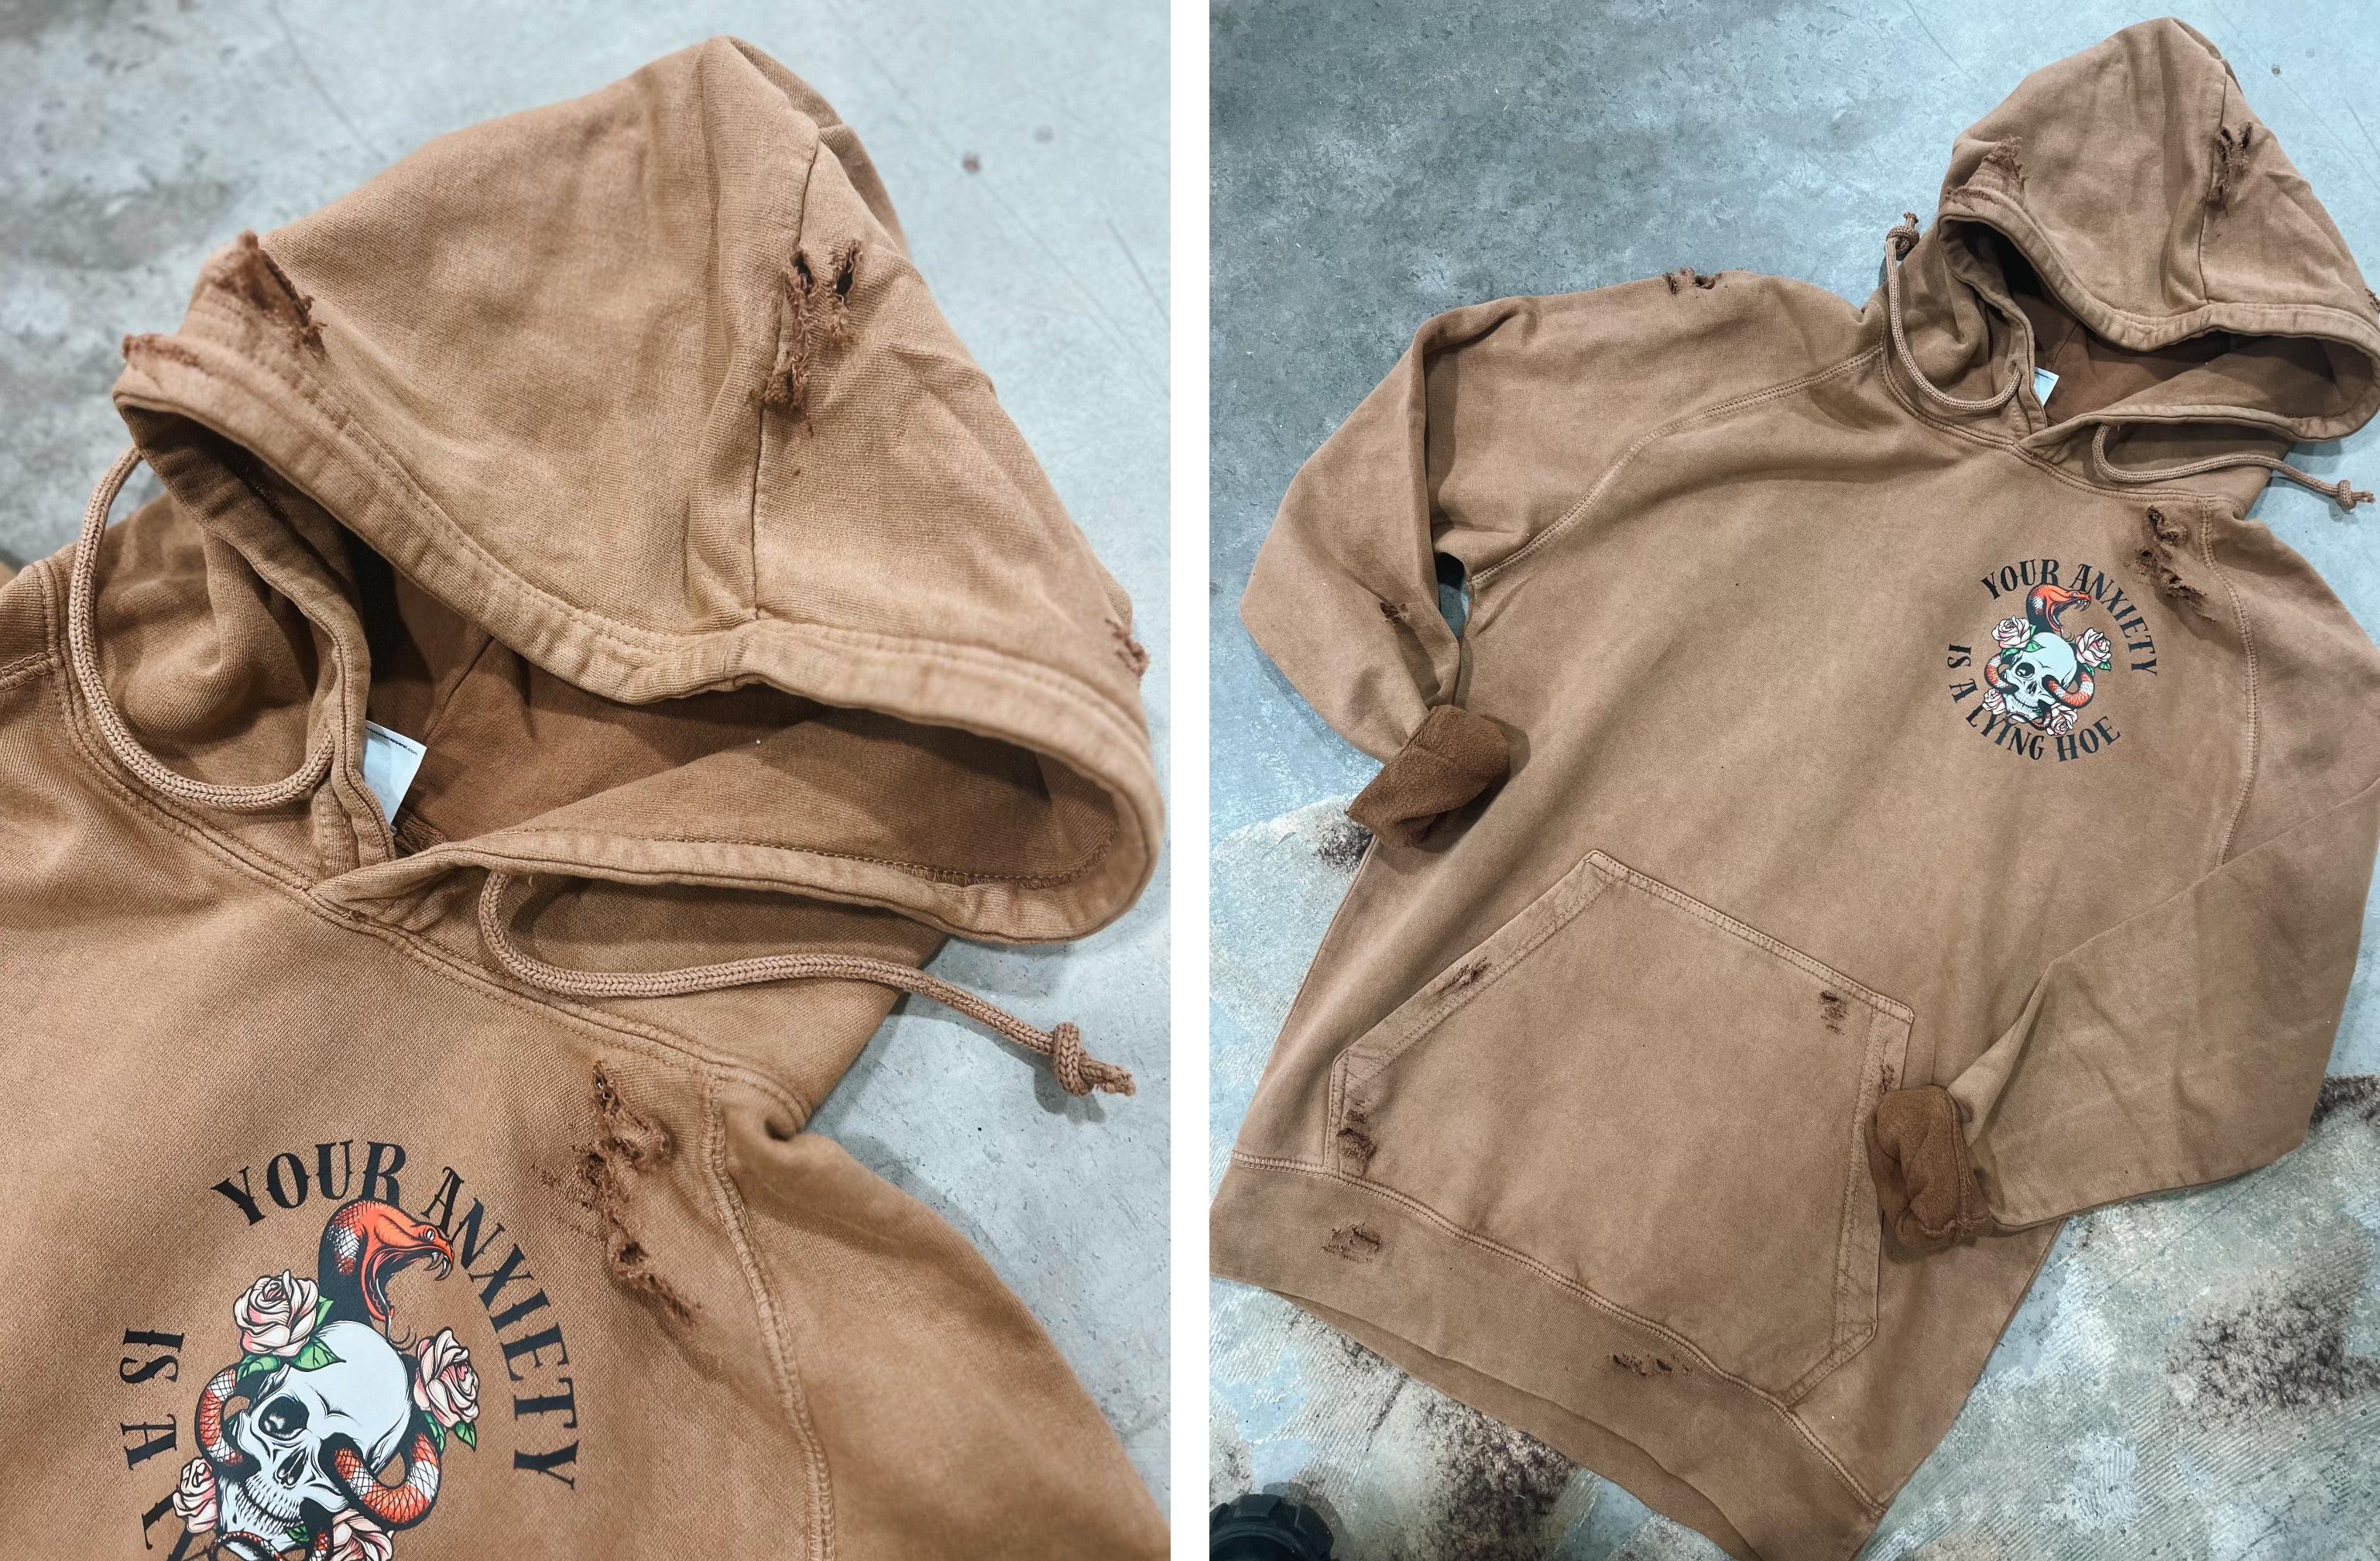
DISTRESSED/DESTROYED
Grab scissors and pick where you want distressing. Using some strength, rub the blade against the fabric until it starts to break down and form holes.
Repeat as much (or as little) as you want, then tug the distressed areas to give it that worn-in, lived-in vibe.
V-NECK CUT OUT
Cut about 1” below the neckline, then create a “V” shape in the center. Tug the edges to roll them.
Don’t pair this with a boat neckline—you’ve gotta pick one.

BOAT NECKLINE
Cut a straight line between the neckline seam and shoulder seam, going evenly across both shoulders.
Tug to roll the edge for that relaxed, off-the-shoulder look.
Don’t combine with a V-neck cut.

SLEEVE HEM CUT OFF
Simply cut off the hem at the end of the sleeves, then tug the edge to roll it. Easy upgrade, instant edge.

BOTTOM HEM CUT OFF
Cut off just the bottom hem of the shirt (no cropping), then tug to create that rolled finish.

SCOOPED BOTTOM
Cut the bottom hem into a soft half-circle (moon shape), then add a 2–3” slit up each side. Tug to roll.

Want to crop + scoop? Expect a higher athletic-style scoop on the sides.

COLD SHOULDER CUTOUT
Start about 1” below the neckline (leave the neckline intact). Cut diagonally toward the shoulder seam to create a triangle opening.
Tug edges to soften the look.

HEM SHREDDING
Create 8–10 vertical slits along the bottom front hem, varying lengths from 2”–12”.
Tug each strip to roll them and give that grungy, shredded finish.
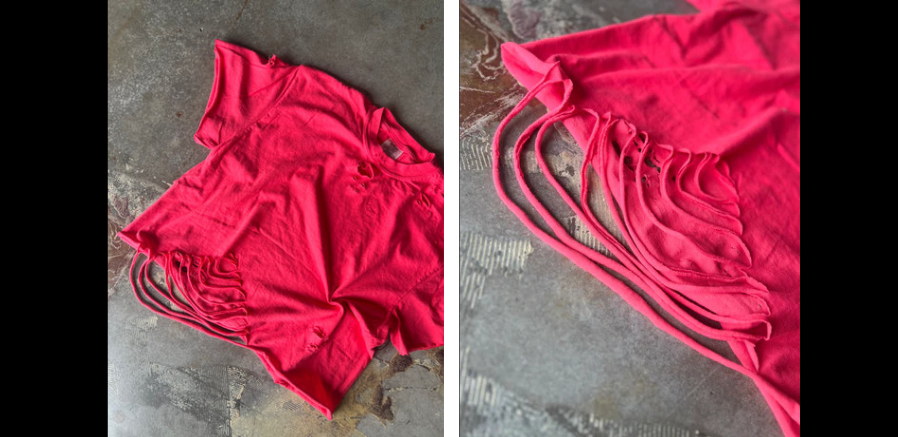
Want more drama? Do it on the back too.

DIAMOND BACK SHREDDING
Fold your shirt by pinching the center of the neckline. Measure 4” down, then mark small dots across (about 1 cm apart).
Cut slits in a diamond pattern—starting longer in the center and gradually shortening as you move outward.
Once done, tug every slit to create that signature shredded look.

MUSCLE SLEEVE CUT OFF
Cut the sleeve off about 3” inside the shoulder seam for a more inset, muscle-style cut. Tug edges to roll.

CAP SLEEVE CUT OFF
Cut the sleeve right along the edge of the shoulder seam for a more open, relaxed cap sleeve. Tug to finish.

DIY Customization Disclaimer:
All customization tips and techniques shared are for inspiration and guidance only. By choosing to alter your item, you acknowledge that you are doing so at your own discretion and risk. Velvet Noire Boutique and its affiliates are not responsible for any damage, errors, or outcomes resulting from at-home customizations.
Any item that has been cut, altered, distressed, washed, or modified in any way becomes final sale and is not eligible for return or exchange.
Handle your pieces with care—and have fun making them your own.
